
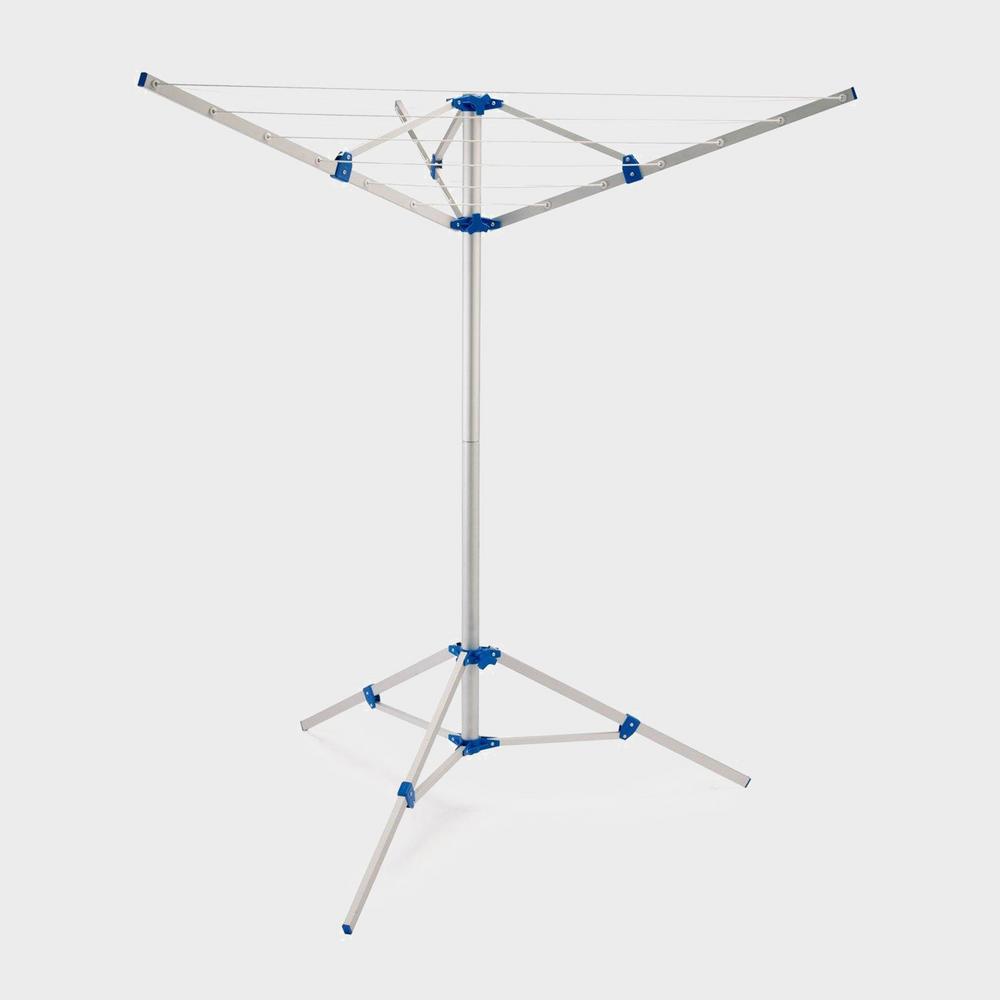
Few pieces of camping gear feel as quietly useful as a good clothes airer. When the kids have soaked their socks in a stream, the dog has found every muddy puddle on site, or your base layers are still damp from yesterday’s hike, having somewhere practical to hang everything can make a surprisingly big difference to comfort. The HI-GEAR 3 Arm Airer is a simple rotary-style airer designed with camping in mind, offering a lightweight, freestanding way to dry kit at camp.
Why a dedicated camping clothes airer is worth packing
It’s easy to assume that you can just drape damp kit over guy lines, chairs and the car mirrors, but that quickly leads to a cluttered, messy pitch. A dedicated airer gives you a single, organised space to dry clothes, towels and tea towels, and it keeps them off the ground and out of mud and grass.
For family camping in particular, the daily pile of damp swimwear, towels and socks soon adds up. A rotary airer like the HI-GEAR 3 Arm Airer concentrates a lot of drying space into a compact footprint, so you’re not stringing washing lines across the pitch or weaving through hanging clothes every time you step out of the tent.
On wetter UK trips, it also helps you turn round kit overnight or during rare dry spells. Even if things don’t get completely dry, a good airing makes them far more pleasant to pull on the next morning.
Meet the HI-GEAR 3 Arm Airer
The HI-GEAR 3 Arm Airer is a three-armed, rotary-style clothes airer designed to be portable enough for camping but sturdy enough for everyday outdoor use. Weighing in at around 1.94 kg and standing approximately 143 cm tall when assembled (with a footprint of about 134 cm by 134 cm), it strikes a balance between stability and packability.
- Weight: 1.94 kg
- Assembled size: 134 x 134 x 143 cm
Those dimensions mean it’s tall enough for most adults to use comfortably without constantly bending down, yet compact enough to tuck between tents on a busy campsite. The three arms provide multiple lines for hanging clothes, giving decent capacity for a family’s daily washing without dominating your pitch.
If you want a deep dive into performance and build quality, you can always read our full review of the HI-GEAR 3 Arm Airer, but here we’ll focus on how to get the most from this style of airer and whether it suits your style of camping.
Who is the HI-GEAR 3 Arm Airer best for?
This kind of freestanding airer is particularly well suited to:
- Family campers who generate plenty of wet towels, swimwear and kids’ clothes.
- Car campers with enough boot space to carry a folding airer alongside the rest of their gear.
- Festival goers who want somewhere to air out clothing and towels between showers.
- Caravan and motorhome users who like to dry things outside rather than cluttering up the interior.
At under 2 kg, the HI-GEAR 3 Arm Airer is light enough to carry from the car to the pitch without feeling like a chore, but it’s still more of a drive-up-campsite accessory than a backpacking item. For most UK camping holidays where you’re driving to site and pitching for a few days, it’s an easy addition that pays for itself in convenience.
Setting up and positioning a rotary camping airer
A little thought when you first pitch your airer will make it more effective and less intrusive.
Choosing the right spot
Look for a flat, reasonably firm patch of ground close to your tent or awning, but not in the way of doors or guylines. Setting the HI-GEAR 3 Arm Airer on uneven or soft ground can make it more likely to lean or wobble once loaded.
Whenever possible, aim for a sunny, breezy location. Airflow dries clothes faster than heat alone, so even on cooler days, an exposed but sheltered-from-rain spot is ideal. Try to keep it away from your stove or barbecue area so there’s no risk of hot sparks reaching the fabric.
Stability and loading tips
Once you’ve extended the airer fully, make sure any locking mechanisms are properly engaged, then load it evenly:
- Hang heavier items closer to the centre of the arms to keep the centre of gravity low.
- Spread weight evenly across all three arms rather than overloading one side.
- Put bulkier pieces, like towels, lower down and lighter items higher up.
On breezier days, you can increase stability by placing water containers or a couple of stones around the base. Some campers also choose to add a light guyline and peg on the windward side for extra security.
Maximising drying performance while camping
UK weather is famously changeable, so getting things dry outdoors can be a bit of an art. A few simple habits will help you make the most of the HI-GEAR 3 Arm Airer or any similar model.
Spin and wring before hanging
The less water in your clothes, the quicker they’ll dry. If you’re washing items by hand in a bucket or sink, wring them out thoroughly before hanging. For towels and thicker garments, rolling them tightly in a spare dry towel and squeezing can remove a surprising amount of extra moisture.
Use pegs to stop items bunching
While rotary airers don’t strictly require pegs, using a few can stop items sliding into a clump, which slows drying and can distort the fabric. Pegging clothes so they hang freely lets air circulate and makes better use of the available space.
Plan drying around your day
Try to get the airer loaded in the morning so damp items have as long as possible in any available sunshine. If rain showers are forecast, consider lighter, quick-drying clothing that can cope with a bit of stop-start drying rather than heavy denim and thick cotton.
Looking after your HI-GEAR 3 Arm Airer
With a little basic care, a camping airer should last for many seasons. The goal is to keep moving parts operating smoothly and prevent corrosion or damage.
- Clean after muddy trips: Wipe the frame and arms down with a damp cloth to remove mud, grass and sand. Grit in the joints can make them stiff over time.
- Dry before storage: Allow the airer to dry fully before packing it away for longer periods, especially after wet-weather trips.
- Check joints and fixings: Every so often, inspect any plastic components and hinges for cracks or excessive play, so you can address issues early.
- Store in a dry place: Keeping the airer indoors or in a dry garage between trips will help prevent rust and fading.
If you’re curious about how well the HI-GEAR 3 Arm Airer stands up to regular use over time, you can always check our detailed hands-on review of the HI-GEAR 3 Arm Airer for long-term impressions.
Alternatives and complementary gear: where does a chimney starter fit in?
Clothes airers sit alongside a whole ecosystem of campsite accessories that make life more comfortable and efficient. While it’s a very different bit of kit, one interesting complement in the camping category is the Weber Chimney Starter, a popular tool for lighting barbecues and charcoal grills more quickly and consistently.
If you’re regularly cooking over charcoal on your camping trips, the Weber Chimney Starter helps you get an even bed of hot coals with minimal fuss. By speeding up the lighting process, you spend less time crouched over a smoky grill and more time relaxing while your clothes quietly dry on the airer nearby. For more detail on how that works in practice, you can read our full Weber Chimney Starter review.
Thinking about your campsite as a whole system is useful: a reliable way to dry clothes, an efficient way to cook, and a comfortable shelter all contribute to a smoother, more enjoyable trip. The HI-GEAR 3 Arm Airer covers the laundry side of that equation with minimal hassle.
Is a rotary airer right for your camping style?
Before you commit to any specific model, it’s worth asking a few practical questions about how you camp and what you prioritise.
How much space do you have?
The HI-GEAR 3 Arm Airer’s assembled footprint of 134 cm square is relatively modest, but it still needs some breathing room around it to rotate and for clothes to hang freely. On compact or very busy pitches, think about where it will sit in relation to your tent, awning and neighbours.
Packed size will depend on the exact folding mechanism, but if you’re already filling a small car with gear, it’s wise to factor the airer into your packing plan. For campervans and caravans with a bit of storage, a rotary airer usually tucks away neatly in a locker or under a bed.
How long are your trips?
For one- or two-night weekends in mostly dry weather, you might not miss a dedicated airer. Once you’re away for three nights or more, especially with children, the pile of damp items tends to grow, and the value of organised drying space becomes clearer.
If you often camp near the sea, swim in rivers or make regular use of campsite pools, a rotary airer like the HI-GEAR 3 Arm Airer earns its place in the car very quickly.
Do you camp in all seasons?
Early spring and late autumn trips usually involve heavier, warmer clothing that takes longer to dry. In these shoulder seasons, having an outdoor airer lets you get the worst of the moisture off before bringing items into the tent or awning.
Pairing a rotary airer outside with a small, low‑wattage fan or dehumidifier inside (where hook‑ups allow) is a popular strategy for those who like to keep camping well beyond the height of summer.
Other ways to dry clothes at camp
While a rotary airer is a very practical solution, it’s not the only option. Depending on your set‑up, you might mix and match methods.
- Washing lines: Simple, lightweight and cheap, but they rely on suitable anchor points and can encroach on walkways if not carefully placed.
- Drying rails in awnings: Many awnings have built-in rails or attachment points that can take a small drying rack, useful in bad weather but more limited on capacity.
- Radiators and heated towel rails in caravans: Very effective but can increase condensation if ventilation isn’t managed properly.
- Quick-drying clothing: Choosing synthetic or merino layers that dry fast reduces reliance on any single drying method.
The HI-GEAR 3 Arm Airer slots neatly into this mix as a versatile, outdoor-first solution that keeps most of the drying process out of your living space.
Final thoughts
A good clothes airer won’t be the star of your camping photos, but it can quietly transform how tidy and comfortable your campsite feels, especially on longer trips. The HI-GEAR 3 Arm Airer offers a practical balance of weight, size and drying capacity, making it an appealing option for family and car campers who are tired of draping damp kit over every available surface.
If you’re considering adding one to your kit list and want to understand how it performs over multiple trips, material quality and stability included, it’s well worth taking a moment to explore our in‑depth HI-GEAR 3 Arm Airer review, and while you’re planning your set‑up, you might also look at tools like the Weber Chimney Starter to upgrade your camp cooking alongside your camp laundry.